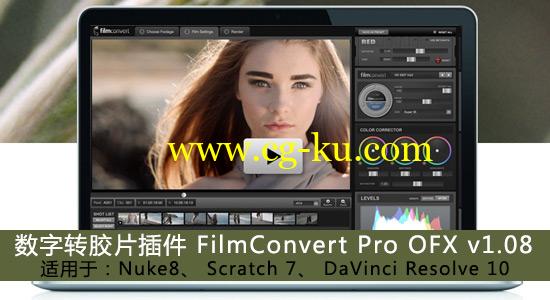
【插件介绍】FilmConvert Pro 是一款将数字摄影机拍摄的素材色彩转换成胶片色彩的工具,可作为独立程序,也可以作为第三方插件,插件支持win系统: Nuke8、 Scratch 7、 DaVinci Resolve 10,11,Vegas 等软件适用素材 RED,DSLR,MOV,内置19种胶片预设,8MM-35MM 镜头噪点设置,操作流程简单,支持4K输出。
支持LUT预设文件导入使用,和保存预设,官网地址:http://www.filmconvert.com/default.aspx最新版本加入了三轮颜色校正界面,同时增强了LUT输出功能
支持软件:(Win系统)– Blackmagic Design DaVinci Resolve 10,11 & 12– Blackmagic Design DaVinci Resolve Lite 10, 11 & 12– The Foundry Nuke 7, 8 & 9– Sony Vegas 11, 12 and 13 – 64 bit only for all versions– Assimilate Scratch 7 and 8FilmConvert OFX 2.07 更新:– 兼容 Fixed in Nuke 9 v7What is FilmConvert?Ever since the introduction of Digital Cameras, digital evangelists have been saying how Film would eventually be superceeded and replaced.
After several decades, this is finally happening.
However, for many people, the look of the digital footage still leaves a lot to be desired and doesn’t look as good straight out of the camera.
What is it about film that people like so much?Some people say that film has a ‘magical’ and ‘organic’ quality that can never be achieved by a digital camera.
We take a more scientific approach.
For many years, the film workflow has been to have the film scanned and then graded digitally.
Both formats end up as digital files, we can compare them and find out the specific differences.
Our tests have shown that film responds to colors in a different way.
Let’s look at an example – shot on Fuji Pro 160s, and the same image shot on a Canon 5D Mk II.
Look specifically how the trees seem to ‘pop’ in the film image.
【插件下载】Vegas/达芬奇/Nuke/OFX数字转胶片调色插件 FilmConvert Pro OFX v2.07全摄像机预设包下载FilmConvert Pro – Film Stock Emulation Software.
Give Digital camera footage the color and grain of your favorite film stocks.
Now available for Blackmagic Design DaVinci Resolve, The Foundry Nuke, Sony Vegas, and Assimilate Scratch.
We’ve said a lot about the digital versus film debate, and a lot of people have a lot of different opinions.
Film still had a technological advantage over digital until really the last few years or so, and now we have digital sensors which can match or exceed film stocks with dynamic range.
Either way, with digital sensors being “too clean” for some people who have loved the look of film, there is a program called FilmConvert that takes the color information of specific cameras and actually uses that to determine how a specific film stock could best be represented using that sensor.
Click through for some videos of the program in action.
Camera Controls– Source Camera Selects the camera (or camera type) used to shoot your footage.
This setting is required in order to apply the correct color correction.
– Exposure Performs an adjustment prior to the film emulation being applied.
– Temp Adjusts the color temperature.
This assumes that the clip temp is 5600 (daylight).
Moving the slider to the left makes the scene cooler.
Moving to the right makes it warmer.
Note for RED footage: You should apply our metadata preset in the Adobe provided “Source Settings” interface.
This preset merely resets all metadata settings to their default, thereby giving FilmConvert a known starting point for color adjustments.
Film Controls– Convert To drop down Selects the particular film stock to be emulated.
– Size drop down Selects the negative size to emulate.
Smaller values such as 8mm are fuzzier with larger grain.
Larger values have smaller grain.
– Film Color slider Adjusts the balance between the original digital camera color palette, and the film color palette. Typically you would leave this at 100% film– Grain slider Adjusts the amount of grain applied to the image.
The default is 100%, which is an accurate representation of the grain for the selected film stocks.
Some stocks have more grain – such as D3200.
– Blur Slider Adjusts the amount of blur applied to the image when either an 8mm or 16mm negative size is chosen.
The default is 100%, which is an accurate representation of the amount of fuzziness that will be present with the selected negative size.
The blur is applied before the grain.

发布日期: 2015-11-30