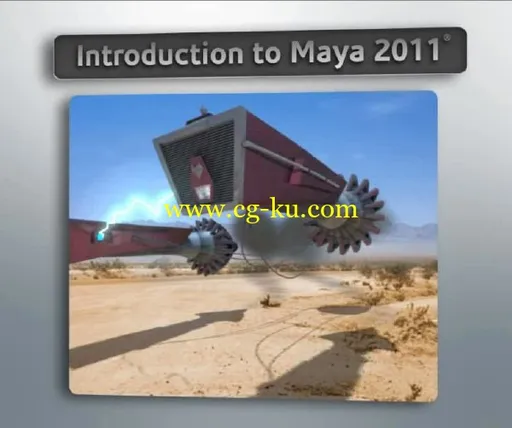
In this series of lessons, we will help you get a strong understanding of
Maya
and how it works. You'll get the chance to work with many of the other Maya instructors here at Digital-Tutors who will show you how to use some of the major components of Maya.
In this course, we'll start by giving you the foundational skills and vocabulary you'll need in order to move around within Maya, and then we'll jump right into the Modeling section of the course. After completing the Modeling section, you'll get the chance try your hand at Texturing, Rigging, Animation, Dynamics, and finally, Lighting and Rendering your own animation. Our goal is not to weigh you down with technical information, but rather to help you form really good habits so you can have a successful future using Maya.
1. Introduction and Project Overview
3. Overview of the User Interface
5. Saving Files and File Types
7. Getting used to QWERTY
9. Using the Attribute Editor
11. Working with the Hotbox
13. Writing Your First MEL Script
15. Modeling Project Overview
17. Building the rear of the engine from NURBS
19. Extruding a vent from the top of the engine
21. Modeling the rear cone and thrust ring
23. Building vents on the sides of the engine
25. Creating the basic shape of the cab
27. Building the windshield and exterior panels
29. Building the cable connectors and hood ornaments
31. Texturing Project Overview
33. Applying and manipulating materials
35. Adding multiple materials to objects
37. Using UVs to prepare polygons for texturing
39. Working with external texture maps
41. Combining ramps with other procedural nodes
43. Using the 3D Paint Tool to paint textures
45. Creating control curves for our objects
47. Organizing the scene and using selection handles
49. Using the Connection Editor to drive values
51. Adding a speed setting for the expression
53. Drawing your first joint chain
55. Making the scene animator friendly
57. Removing channels from the Channel Box
59. Managing key frames with the Graph Editor
61. Animating objects using path animation
63. Modifying key frames using the time slider
65. Dynamics Project Overview
67. Adding Fire to the Engine
69. Creating a Particle Simulation
71. Modifying the Shape of the Particles
73. Overview of various light types in Maya
75. Rendering with depth map shadows
77. Using Image Planes to create a renderable environment
79. Using the Attribute Spread Sheet to adjust multiple objects
81. Using Light Linking to control an object's illumination
83. Using the 2D Pan/Zoom feature in Maya
85. Adding displacement maps to Maya geometry
2. Creating Your First Object
4. Creating a Project in Maya
6. Viewing Geometry
8. Channel Box and Layer Editor
10. Grouping and Parenting
12. Selection Masks
14. Working with Shelves
16. Modeling the basic shape of the engine shell
18. Extracting a rim from the front of the engine
20. Adding slats to the main vent of the engine
22. Adding radial struts around the engine
24. Adding a power coupling and side rail
26. Modeling the cab interior
28. Adding rails over the racer cab
30. Modeling cables from NURBS curves
32. Hypershade overview
34. Modulating color using ramps
36. Using transparency with our materials
38. Working with procedural textures
40. Using bump maps to simulate depth
42. Adding a car paint material
44. Introduction to the Rigging & Animation Process
46. Using display layers to organize our rig
48. Creating custom attributes
50. Writing your first expression
52. Using Set Driven Key to simplify the rigging process
54. Binding the geometry onto joints
56. Adding random movement through expressions
58. Learn to set key frames and use the time slider and Graph Editor
60. Creating a cycling animation
62. Using the Auto Key feature
64. Creating Playblasts to preview the animation
66. Using the Fire Effect
68. Using the Lightning Effect
70. Getting Smoke Behavior
72. Introduction to the Lighting and Rendering Section
74. Exploring common attributes of Maya lights
76. Rendering with raytraced shadows
78. Matching Maya light sources to a photographic environment
80. Isolating shadows with the Use Background shader
82. Matching the Maya camera to a photographic environment
84. Adjusting the rendered smoothness of NURBS objects
在这一连串的经验教训,我们将帮助您获得较强的理解,
Maya
和它是如何工作。你会在数字导师将向您展示如何使用一些玛雅人的主要组件与许多其他玛雅教官在这里工作的机会。
在此过程中,我们先来给你的基本技能和您需要才能在玛雅人中, 移动的词汇,然后我们会跳进建模部分课程的权利。在完成建模部分之后, 你会机会尝试你的手在纹理、 索具、 动画、 动力学,和最后,灯光和渲染自己的动画。我们的目标是不你压垮的技术信息,而是要帮助你养成真的好习惯,这样你可以有一个成功的未来使用玛雅人。
1.介绍和项目概述
3.用户界面概述
5.保存文件和文件类型
7.习惯 qwerty 键盘
9.使用属性编辑器
11.与热阻的工作
13.写你第一个 MEL 脚本
15.建模项目概述
17.建立发动机后方的 NURBS 从
19.挤压排气从顶部的引擎
21.建模后方锥和止推环
23.建设喷口两侧的发动机
25.创建 cab 的基本形状
27.建设挡风玻璃和外观面板
29.建立电缆连接器和罩饰品
31.纹理项目概述
33.应用和操作材料
35.向对象添加多个材料
37.使用 UVs 来准备多边形贴图
39.与外部纹理映射的工作
41.将坡道结合其他程序的节点
43.使用 3D 的油漆工具来绘制纹理
45.创建控制曲线为我们的对象
47.组织现场和使用选择手柄
49.使用连接到驱动器值编辑器
51.添加速度设置为表达式
53.你第一次的联合链图
55.制作场景动画师友好
57.从通道框中删除频道
59.使用图形编辑器管理关键帧
61.对使用路径动画的对象进行动画处理
63.修改关键帧使用时间滑块
65.动态项目概览
67.添加火到引擎
69.创建粒子模拟
71.修改粒子的形状
73.在玛雅人的各种光类型概述
75.与深度地图阴影的渲染
77.使用图像平面来创建一个可呈现的环境
79.使用属性传播表调整多个对象
81.使用光链接来控制对象的照明
83.在玛雅人中使用二维平移/缩放功能
85.添加位移映射到玛雅几何
2.创建你的第一个对象
4.在玛雅人创建一个项目
6.查看几何
8.通道框和层编辑器
10.分组和养育子女
12.选择面具
14.与货架上的工作
16.建模发动机壳体的基本形状
18.从前面的引擎中提取边缘
20.将板条添加到引擎的主要发泄
22.添加在发动机径向 struts
24.添加一个功率耦合和侧轨
26.模拟驾驶室内饰
28.到了赛车驾驶室上方添加轨道
30.建模电缆从 NURBS 曲线
32.Hypershade 概述
34.调制颜色使用坡道
36.与我们的材料使用透明度
38.使用程序纹理
40.使用凹凸映射来模拟深度
42.添加汽车油漆材料
44.简介的索具与动画过程
46.使用显示图层来组织我们的钻机
48.创建自定义属性
50.写你的第一个表达式
52.使用设置驱动关键简化操纵过程
54.具有约束力的几何上接头
56.添加随机运动通过表情
58.学会设置关键帧,使用的时间滑块和图形编辑器
60.创建一个循环的动画
62.使用自动关键功能
64.创建 Playblasts 预览动画
66.使用火效果
68.使用闪电效果
70.得到烟行为
72.照明和渲染部分的简介
74.探索共同属性的玛雅人灯
76.与光线追踪阴影的渲染
78.匹配玛雅光来源摄影环境
80.孤立使用背景着色器的影子
82.匹配玛雅相机摄影的环境
84.调整的 NURBS 对象呈现的平滑度