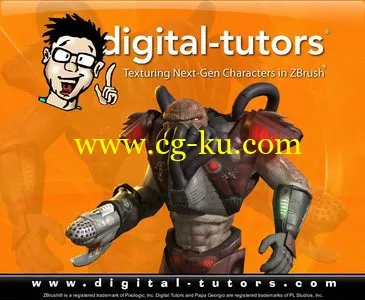
Texturing Next-Gen Characters in ZBrush + Project Files
2xDVDRip | MOV | 788x648 | English MP3 @ 176 Kbps | 04:15:31 | 955 Mb
Genre: eLearning
Learn a production workflow and time-saving methods for creating game-ready textured characters, texture painting techniques, and adding character enhancements for appeal. Contains over 4 hours of project-based training for artists learning the creative processes of texturing characters for next-generation games. Popular highlights include: Setting up base materials in ZBrush; Filling Subtools with Color; Painting Illuminated Panels; Painting with Symmetry; Isolating Portions of Subtools; Working with Polygroups; Cavity Masks to Emphasize Detail; Painting Wear into Armor; Adding Color Variation; Layering Color and Detail for Skin; Blending Textural Detail with Alphas; PolyPainting Techniques; Photoshop Integration with ZApplink; Cloning Photographic Detail; Painting Scarring and Decay; Converting PolyPaint Colors to Texture Maps; Painting with Projection Master; Using Cavity Maps as Texture Guides; Editing Textures in Photoshop; Assembling Textures in Photoshop; Painting Specular Maps in ZBrush.
Table of Contents:
Project overview and workflow discussion 06:07
Using paint-overs to work out color schemes 06:34
Setting up materials in ZBrush 05:32
Applying base colors to subtools 09:55
Blocking in colors for the flesh 12:30
Adding underlying color and texture to the flesh 14:09
Adding spot detail with alphas 13:01
Blending skin detail together 12:41
Finishing the skin 07:38
Painting the scarring on the arm and abs 12:02
Painting the leg base 08:01
Painting the raised armor panels 08:28
Using cavity masking to emphasize detail 06:22
Painting recessed areas 10:12
Painting the tubes 09:48
Painting the gun 13:22
Adding wear and tear to the armor pieces 09:46
Adding blast marks and damage to the armor 07:42
Painting illuminated panels into the armor 09:46
Using the ZProject brush to clone detail from photographs 07:14
Converting poly-paint colors to texture maps 07:34
Using Projection Master to paint detail 05:21
Using ZApplink to connect to Photoshop 11:27
Painting textures in Photoshop 09:12
Assembling and saving out textures in Photoshop 05:07
Rendering textures and normal maps in mental ray 05:28
Painting a specular map in ZBrush 13:06
Bonus Lesson: Using cavity maps as painting guides in Photoshop 05:27
贴图在 ZBrush + 项目文件中的下一代字符
2xDVDRip |MOV |788 x 648 |英语 @ 在 176 Kbps MP3 |4:15:31 |955 mb
流派: 电子学习
了解生产流程和节省时间的方法创建游戏准备纹理的特征,纹理绘画技法,并添加字符增强上诉。包含超过 4 个小时的艺术家学习贴图字符为下一代游戏的创意过程基于项目的训练。热门的重点包括: 建立基层材料在 ZBrush;填充颜色; 子工具绘画照明面板;绘画与对称性;孤立子工具; 的部分使用 Polygroups;腔口罩,注重细节;绘画磨损成盔甲;添加颜色变化;分层的色彩和细节的皮肤;混合纹理细节与阿尔法;上色技术;Photoshop 结合 ZApplink;克隆的摄影细节;绘画的疤痕和衰变;转换 PolyPaint 颜色与纹理映射;绘画与投影大师;利用腔映射纹理的指南;编辑纹理在 photoshop 里;装配在 Photoshop; 纹理绘画在 ZBrush 的高光贴图。
表的内容:
项目概述和工作流的讨论 6:07
使用油漆剩菜上班出颜色方案 6:34
设置在 ZBrush 材料 5:32
将基准颜色应用于子工具 9:55
在颜色堵住了肉 12:30
将基本的颜色和纹理添加到肉 14:09
添加点细节与阿尔法 13:01
混合皮肤细节一起 12:41
整理皮肤 7:38
绘画上手臂和 abs 12:02 疤痕
绘画的腿基地 8:01
绘画提高的装甲板 8:28
利用腔掩蔽强调细节 6:22
绘画凹地区 10:12
画管 9:48
喷漆枪 13:22
将磨损添加到护甲片 9:46
添加爆炸痕迹和损坏的盔甲 7:42
绘画照明面板的盔甲 9:46
使用 ZProject 刷来克隆细节从照片 7:14
将聚油漆颜色转换为纹理映射 7:34
使用投影大师画细节 5:21
使用 ZApplink 连接到 Photoshop 11:27
绘画在 Photoshop 中的纹理 9:12
装配和节约出纹理在 Photoshop 中 5:07
渲染纹理和法线贴图的心理线 5:28
绘画在 ZBrush 的高光贴图 13:06
附加课: 使用腔映射作为绘画指南在 Photoshop 中的 5:27