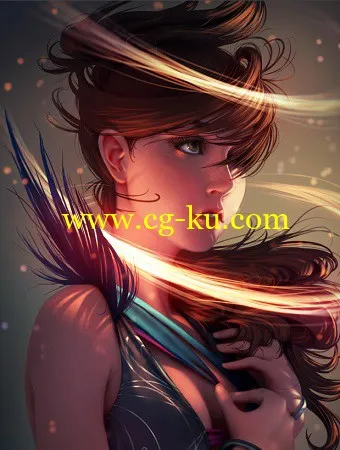
CGCookie – Painting with Ambient Occlusion
Info:
PAINTING WITH AMBIENT OCCLUSION
Ambient occlusion (AO) is best described as the soft, subtle shadowing that appears between close objects and other tight spaces where light can’t easily reach. When emphasized in the painting process, AO gives art a very distinct look — almost like a computer-generated 3D model.
1. After doing a few thumbnails to explore lighting possibilities for the piece, start off by drawing decently clean line art and reducing the opacity. Below that, begin working on the ambient occlusion layer.
2. To render AO, use a soft black brush on edges, and then a hard eraser to clean them up. Slowly work around the piece, fleshing out forms and managing overlap until, eventually, everything occupies a place within the three-dimensional space of the scene. The finished AO layer is set to Multiply.
3. Flat colors are set beneath the AO layer and painted with an opaque brush. Every element of the painting, from skin to clothing, should be on a separate layer. The values used are darker than what will appear in the final piece — this step is intended to simulate how the scene appears when in shadow.
4. Light sources are added, one by one, on Overlay layers above the AO and flat colors. Light is literally painted onto objects with a white brush. Later, they can be adjusted by using the Hue/Saturation window.
5. Once all the lighting is set, the final step is to polish the painting through post-production, the options of which include: over-painting, color adjustment layers, and/or screen effects.
CGCookie
— —
用
环境
遮挡
绘画
信息
︰
用
环境
遮挡
绘画
环境
遮挡
(AO)
是
最好
被描述
为
软
、
微妙
隐藏
显示
之间
密切
的
对象
和
光
不能
轻易
到达
其他
狭小
的
空间
。
当
强调
在
绘画
过程
中
,
AO
提供给
艺术
一个
很
独特
的
外观
— —
几乎
就
像
一个
计算机生成
的
3D
模型
。
1.
后
做
几
个
缩略图
,
以
探索
这块
照明
的
可能性
,
通过
绘制
体面地
开始
清洁
艺术
线条
和
减少
不透明度
。
下面
,
开始
环境
遮挡
层
上
的
工作
。
2.
要
使
岙
,
使用
柔软
的
黑色
笔刷
边缘
,
然后
硬
橡皮
来
清理
掉
它们
。
周围
一片
,
充实
形式
慢慢地
工作
和
管理
直到
重叠
,
最终
,
一切都
占有
一席之地
的
三维
场景
的
空间
内
。
成品
的
AO
层
设置
为
正片叠底
。
3.
平
颜色
是
AO
层
下方
设置
,
一个
不透明
的
笔刷
涂上
。
这
幅画
,
从
皮肤
到
服装
,
每个
元素
应当
在
单独
的
图层
。
使用
的
值
是
比
什么
会
出现
在
最后
一块
暗
— —
这
一步骤
的
目的
模拟
现场
在
阴影
中
的
显示
方式
。
4.
光源
是
补充说
,
一个
接
一个
,
对
堆焊
层
以上
AO
和
单调
的
色彩
。
光
从字面上
涂
上
用
白色
画笔
的
对象
。
后来
,
他们
可以
通过
使用
色相/饱和度
窗口
调整
。
5.
一旦
所有
的
照明
设置
,
最后
一步
是
波兰
通过
后期制作
,
其中
选项
包括
绘画
︰
过度
绘画
、
色彩
调整
图层
,
和/或
屏幕
效果
。