10 Lessons Project Files Included MP4
Title: FXPHD – KAT201Intermediate KATANA
Info:
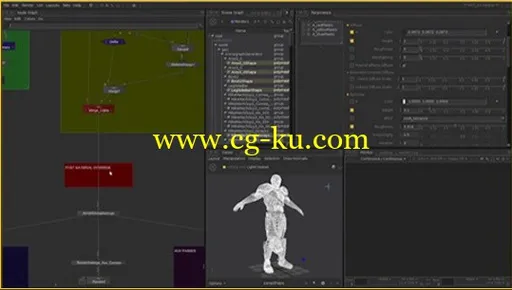
In our ‘Intermediate KATANA’ course we’ll take everything we learnt in KAT101 and put it into practice by adding a CG character into two live action plates. During the term we’ll be working with 3D tracking data and building stand-in geometry for the environments using MAYA. We’ll be completing look development within KATANA for an entire character along with various environment assets as required. When it comes to lighting the scenes we’ll be utilizing ‘localized HDR lighting’ with KATANA using RenderMan’s Global Illumination technology and then setting up various render-passes. Finally we’ll move into NUKE to complete the final compositing. This course is a natural progression from our first 100 level KATANA course and fantastic for anyone interested in state-of-the-art Look Development and Lighting techniques.
Matt Leonard has been in the 3D and visual effects industry for 20 years. He has spoken at various events and shows on behalf of Autodesk, The Foundry and eyeon Software and has had articles published in various magazines and journals. He is a member of the Visual Effects Society and has worked as a beta tester for Maya, Katana, Arnold, RenderMan, Mari and Nuke. He currently runs his own on-site training company in the UK and has trained artists from companies such as ILM, Pixomondo, MPC and Framestore.
KATANA is available on the VPN, but the install requires advanced linux knowledge and is not for the average user. KATANA 1.1v6 is tested and qualified on Linux 64-bit CentOS/RHEL 5.4 and requires A graphics card which supports OpenGL shader model 4
course syllabus
CLASS 1
In our first Katana 201 class we look at the project we will be covering over the next 9 weeks. We start by looking at the shots we will be working on, then the main workflow. We then talk about HDRI Lighting vs. Localised HDRI Lighting before doing some practical work in Maya. We then talk about the main Templete file we will be using in Katana before moving into Katana itself. A bonus video helps to explain how to load a Katana template.
CLASS 2
In our second class we look at preparing the main environments. We start by looking at the camera track of the kitchen done in Syntheyes, from there we export the tracking data from Nuke into Maya where we set up the correct camera back and Image Plane. Next we bring in the high resolution geometry of the kitchen to see how it fits with the tracking data. Then we return to Nuke and using ModelBuilder we rough out some basic geometry for the kitchen and then bring that back into Maya. Finally we talk about light placements.
CLASS 3
Our third class starts with importing the pre-build Alembic cache of our main character. From here we assign its geometry into various Collection sets before building some basic shaders and assigning them to the geometry. Finally we build a basic Lighting Rig and run some test renders to make sure everything is working correctly.
CLASS 4
In our fourth class we start by looking at Physically Plausible Shaders and Lights using RenderMan inside of Katana. We then build some Physically Plausible Shaders which are assigned to the geometry of our environment. From there we add Physically Plausible Lights and look at using Aim to orientate them correctly. From there we talk about Co-Shaders vs Monolithic Shaders before building a Co-Shader setup in Katana.
CLASS 5
In our fifth Katana class we look at extracting the specific local image parts from the main high dynamic range capture of the kitchen. These localized HDRI’s are individually saved before being converted to RenderMan .tex and .env files using TXMAKE. From there we clean up the original image removing the lights we’ve extracted. Finally we move into Katana and build a test scene using Plausible shaders, Plausible Lights (with our new HDR’s attached) and full Global Illumination.
CLASS 6
In our sixth Katana class we start by looking at Scenegraph XML, a system for transferring data from Maya to Katana using an .xml and Python setup. Ben Greasley then takes up through the scripting side of things being we return to Katana to try the result. The second half of the class continues to look at the Plausible shaders for RenderMan. We have Christos Obretenov from Lollipop Shaders taking us through how he edited the RenderMan shaders (adding the AOV’s) and re-compiled them into the final .slo files we use in Katana. From there we add one of the new AOV Shaders to our master model, imported in via the new ScenegraphXML system and render out some AOVs. Finally be bring them into Nuke and build a very simple composite.
CLASS 7
In our seventh class we start in Maya and look at some issue regarding last weeks ScenegraphXML relating into UV’s and Normals. From there we move into Katana and look at the creation of the final Shaders and Textures for our main character. We also look at CEL and how it can be used to help automate the tas
10 堂课项目文件包括 MP4
标题︰ 数码 — — KAT201︰ 中级武士刀
信息︰
在我们 '中级武士刀' 的课程,我们会采取一切我们学过的 KAT101 和 CG 人物加入两个真人板把它付诸实施。在任期内我们将工作与 3D 跟踪数据和建筑环境使用玛雅的替身几何。我们会完成整个字符以及作为所需的各种环境资产内武士刀看发展。照明场景的时候我们将会利用 '本地化的 HDR 照明' 与武士刀使用 RenderMan 的全局光照技术,然后设置各种渲染通道。最后我们将进入核弹来完成最后的合成。本课程是一个自然的进程,从我们第一次 100 级武士刀课程和神奇感兴趣国家艺术看发展和照明技术的人。
马特 · 伦纳德一直在 3D 和视觉特效工业 20 年了。他曾在各种场合和显示代表欧特克、 铸造和监视着软件并已文章发表在各种杂志和期刊。他是视觉影响社会的一份子,曾作为 beta 版测试人员为玛雅、 武士刀、 阿诺德、 RenderMan、 马里和核弹。他目前经营着自己的现场培训公司在英国,已培训艺术家从 ILM、 Pixomondo、 MPC 和 Framestore 等公司。
武士刀上是可用的 VPN,但安装需要先进的 linux 知识,不是为普通用户。武士刀1.1v6 是测试,合格在 Linux 64 位 CentOS/RHEL 5.4 和需要的图形卡,支持 OpenGL 着色器模型 4
课程大纲
1 类
我们第一次的武士刀 201 班,我们看看该项目我们将在未来 9 周覆盖。我们先看我们会的工作,然后主要的工作流的镜头。我们然后做一些实际工作中玛雅之前谈论 HDRI 照明与局部 HDRI 照明。然后,我们谈论我们将搬进了武士刀本身之前使用中武士刀的主模板文件。视频的奖金帮助解释了如何加载一个武士刀模板。
2 班
在我们第二个类,我们看看准备的主要环境。我们先看摄像机跟踪在 Syntheyes做厨房的从那里我们将导出跟踪数据从 Nuke 到玛雅人在这里我们把相机设置好正确回与图像平面。下一步我们带厨房的高分辨率几何中来看它是如何与跟踪数据。然后我们返回到核弹和使用构建我们粗糙了一些基本的几何为厨房,然后把那个带回导入 Maya。最后我们谈论光安置。
3 类
我们第三班开始导入预先生成蒸馏器缓存的我们的主要特征。从这里我们进入各种集合集之前建立一些基本的材质和将它们分配到几何分配其几何形状。最后我们建立一个基本的照明装置和运行一些测试渲染,以确保一切工作正常。
4 班
在我们第四堂课我们先看物理上合理着色器和灯光使用 RenderMan 内武士刀。我们然后生成一些物理上合理着色器被分配到我们的环境的几何形状。从那里我们添加物理上合理灯,看看使用目的以他们正确的定位。从那里我们在构建共同着色器安装在武士刀之前谈论共同着色器 vs 单片着色器。
第五类
在我们第五次的武士刀班我们看看具体的局部图像部分提取主要的高动态范围捕获的厨房。这些本地化的 HDRI 单独保存之前被转换为使用 TXMAKE 的 RenderMan.tex 和.env 文件。从那里我们清理原始图像删除我们已经提取的灯。最后我们将移动到武士刀和建立一个测试场景使用可信的着色器,似是而非的灯 (与我们新的HDR 的附加) 和完整的全局光照。
6 班
在我们第六的武士刀类我们先看 Scenegraph XML,将数据从玛雅人转移到武士刀使用.xml 和 Python 安装系统。本格里然后占用通过脚本事物的一面被我们返回到武士刀尝试的结果。类的第二个一半继续振振有词着色器 RenderMan 看。我们有克里斯托 Obretenov 从棒棒糖着色器带我们通过他如何编辑 (添加 AOV) 的 RenderMan 着色器和重新编译它们到我们用武士刀的最后.slo 文件。从那里我们将新的 AOV 着色器之一添加到我们的主模型,通过新的 ScenegraphXML 系统中导入,并呈现出一些 AOVs。最后将他们带入核弹和构建一个非常简单的复合。
7 类
我们第七班我们在玛雅人开始,看看一些关于最后几周 ScenegraphXML 的问题有关的紫外线和法线。从那里我们搬入武士刀,看看最终的着色器和纹理创作为我们的主要特征。我们也看看 CEL 以及如何用它来帮助自动化助教