Duration 2h 39m MP4
Title: MackleyStudios – Animating Motion with Cinema4D and MotionBuilder by Greg Kulz
Info:
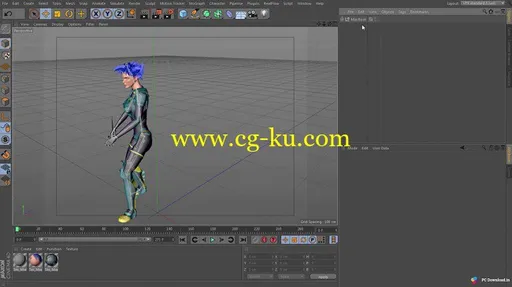
In the ten chapters of the series, we work with the motion of aliens, knights, SWAT, and robots to swing a sword and a tail, do parkour, rage-out on boxes, and throw a punch.
The MotionBuilder training series will give you the workflow and the tools you need to make your Cinema4D characters move. The tools and concepts reviewed include story tool, characterizing skinned figures, key reduction, matching, parenting constraint, physics solver, rag-doll, synchronized motion clips, and fine-tuning the secondary movement in C4D.
Chapters:
01: Basic Workflow
We kick off the MotionBuilder training series by creating a skeleton to export into Cinema4D. First, we’ll bring the characterized model into a scene. Then, we’ll merge the motion data into the skeleton, set that to drive the model and bake the animation to the skeleton. It’s a great start to the series!
02: Story
In Chapter 2, we’re going to use the story window to create a character animation track. Using the story track allows us to compare various motion clips on our character, duplicate clips to make a looping run cycle, and blend additional clips seamlessly with the matching tool. Then, once the motion is baked to the bones, the animated figure can be exported to Cinema4D.
03: Person
In Chapter 3 of the MotionBuilder series, we’ll work with two characters using two synchronized motion clips. First, we’re going to create a control rig for our swashbuckling figure with a sword and set the hands in a realistic pose. Then we’ll merge in a second figure and create a second control rig duplicating the first figure’s sword and positioning it in the second figure’s hand. We’ll use what we went over in Chapter 2 by creating a character track for each figure. Then, we put the first part of the synchronized motion capture in one track and the second part in another track. Finally, we bake the motion to the bones of both figures and export to C4D as a single file.
04: Parkour
This is my favorite chapter of the series. We’re going to bring in two figures again and create character tracks for them. This time though, we’re going to bring in a vaulting and loop-able running clips and arrange the ghosts and time them to do some vaulting over a box.
05: Naming Joints
In Chapter 5, we’ll review some of the fundamental concepts related to naming conventions. First, we’ll use a few different skeletons and explore various joint naming conventions to enable the automatic characterization process in MotionBuilder. Then, we’ll compare a characterized mocap clip to a raw BVH file. Finally, we’ll go over preparing the BVH file to be characterized.
06: Dynamics
Have you ever wanted to make someone punch a stack of boxes? In Chapter 6, you’ll have your chance, as we apply idle and punching clips to a figure, add a physics solver to the scene, create and set up cubes with rigid body properties, enable the solver, and POW! watch our boxes come tumbling down.
07: Ragdoll Setup
Let’s keep up the story from Chapter 6 and add a new figure to the scene. We will create hurt and down poses in the pose control tab, create a second character track, add an idle clip and position to receive punch, create a ragdoll dynamic proxy rig and our unsuspecting new figure is ready to be sucker punched.
08: Ragdoll Export
In Chapter 8, we go over taking our combatants from Chapter 7 and exporting them into Cinema4D. We want to use poses to guide the dynamics and will use the solver to set that up. Our ragdoll solve becomes a clip in the story tab, then we bake the animation to the control rig and follow up by baking to bones before we export.
09: Animation Layers
A great feature of MotionBuilder is using keyframe animation to refine the mocap to compensate for things such as strange alien body shape discrepencies or uneven ground. In the animation layers tab, we’ll create a new layer and keyframe our adjustments. Then, in the filters tab, we’ll use the key reducer filter to get rid of keys we don’t need. As usual, we’ll wrap it up with baking to bones and exporting to C4D.
10: Dynamic IK
In the final Chapter of the MotionBuilder training series, we’ll follow up with what happens to all those figures we’ve been exporting into C4D, using the alien figure from Chapter 9. In C4D, we’ll create a disk and apply a collider tag to be our ground plane, then apply an IK tag to the tail and enable dynamics. We’ll finish up the chapter by fine-tuning the dynamics setting to create your custom alien tail movement.
持续时间 2 h 39 m MP4
标题︰ MackleyStudios — — 动画具有运动 Cinema4D 及由格雷格 Kulz MotionBuilder
信息︰
在十章的系列中,我们一起运动的外星人、 骑士、 斯瓦特和机器人摆动一把剑和一条尾巴,做跑酷,愤怒出箱子,并打出拳。
MotionBuilder 培训系列会给你的工作流程和工具,你需要使你 Cinema4D 字符移动。工具和概念综述包括故事工具,表征皮肤的人物、 关键减少、 匹配、 育儿约束、 物理规划求解、 布娃娃、 同步动画剪辑和微调 C4D 的辅助运动。
章节︰
01︰ 基本工作流
我们通过创建骨骼能够导出到 Cinema4D 序幕 MotionBuilder 培训系列。首先,我们将到现场为特征的模型。然后,我们会将运动数据合并到骨架,集驱动模型和烘烤到骨骼动画。它是一系列的伟大开端 !
02︰ 故事
第 2 章中,我们要使用故事窗口创建字符动画轨道。使用故事跟踪允许我们把比较各种动作片段对我们的性格,重复剪辑,以使循环运行周期,和混合与匹配工具无缝的其他剪辑。然后,一旦这项议案烤的骨头,动画的人物可以导出到 Cinema4D。
03︰ 人
MotionBuilder 系列第 3 章,我们将使用两个字符使用同步的运动的两个剪辑。首先,我们要用剑创建为我们虚张声势图控制钻机并设置手在一个现实的姿势。然后我们会在第二个身影合并,并创建第二个控制 rig 复制第一个图剑和定位在第二个图的手。我们将使用什么我们走过去在第 2 章通过创建为每个图形字符轨道。然后,我们将在一个轨道同步的运动捕获的第一部分和第二部分在另一条轨道。最后,我们烤到骨子里的这两个数字的议案,并出口到 C4D 作为单个文件。
04︰ 跑酷
这是我最喜欢的章节的系列。我们要再一次带来的两个数字并为它们创建字符轨道。这一次,我们要带拱顶和循环能运行剪辑和安排鬼和时间去做一些保险存储到一个盒子。
05︰ 命名接头
第 5 章,我们将回顾一些有关命名约定的基本概念。首先,我们会使用一个不同的骨骼和探索各种联合的命名约定,以便在 MotionBuilder 自动表征过程。然后,我们将比较原始的 BVH 文件特征的 mocap 剪辑。最后,我们就去准备 BVH 文件特点。
06︰ 动力学
你曾经想要使某人打一摞盒子吗?第 6 章,你就得你的机会,我们应用空闲和冲孔剪辑到图中,将一个物理求解器添加到现场,创建和设置多维数据集具有刚体属性,使规划求解和战俘 !观看我们的盒子轰然倒塌。
07︰ 布娃娃安装程序
让我们保持了这个故事从章 6 和添加新的图到现场。我们将创建伤害和下姿势的姿势控制选项卡中,创建第二个字符轨道、 添加空闲剪辑和位置接收冲床,创建动态代理 rig 布娃娃和我们毫无防备的新图是准备将一拳。
08︰ 布娃娃出口
第 8 章,我们复习我们战斗人员从章 7,将其导出到 Cinema4D。我们想要使用姿势引导力度,将使用规划求解才能完成设置。我们布娃娃解决成为故事选项卡中的剪辑,然后我们烤到控制钻机动画和跟进,烘烤到骨头,我们在导出之前。
09︰ 动画层
MotionBuilder 的一个重要功能使用关键帧动画要细化 mocap 弥补之类的奇怪的外星人尸体形状 discrepencies 或不平的地面。在动画图层选项卡,我们将创建一个新的图层和关键帧我们的调整。然后,在筛选器选项卡,我们将使用主减速机过滤器摆脱我们不需要的钥匙。像往常一样,我们会总结一下与烘烤的骨头和 C4D 向出口。
10︰ 动态 IK
在 MotionBuilder 培训系列的最后一章,我们会跟进所有这些数字,我们已经将导出到 C4D,使用从章 9 外星人图身上发生了什么。在 C4D,我们会创建磁盘并将对撞机标记我们地面的飞机,然后将 IK 标记应用到的尾部,使动力学应用。我们会通过微调的动态设置创建您的自定义外星尾巴运动完这一章。