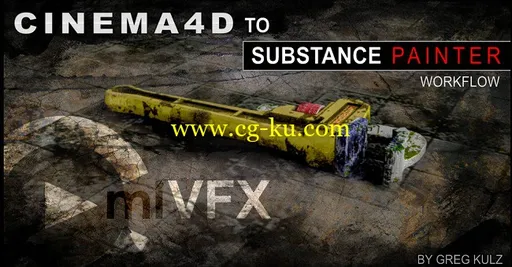
Duration 2h 23m Project Files Included MKV
Title: cmiVFX – Cinema 4D to Substance Painter Workflow
Info:
In this series, I go through my procedure for taking a model from Cinema4D, preparing it for Substance Painter, doing everything we need to paint it and create all our maps in Substance Painter, and then bringing it back into Cinema4D to take advantage of the physically-rendered properties that we created.
It was a lot of fun and I hope you’ll join me and learn a couple of new things!
Chapters:
01: Spanner Setup
In chapter 1, we set up a simple asset to be painted in Substance Painter. We start by collapsing a model to a low-res polygon object. To get the best results out of Substance Painter, you have to make sure your model has a nice UV layout with no overlapping. We’ll use a variety of polygon selection tools, such a loop, ring, grow, fill, and UV tools, such as UV-peeler and relax, to create a packed UV page. Then we’ll export both a high-res and a low-res polygon version.
02: Spanner Paint
In chapter 2, we open up Substance Painter and we create a new project, with which we add our new, low-polygon object. We’ll familiarize ourselves with the different managers: the shelf, layers, texture-set settings, paint properties. And then, using our higher-res mesh, we’ll bake out various maps: ambient occlusion, normal, curvature, etc. Then we add a rough metal preset material to a layer, over which we place a rust material with a mask generator. Then, by fine-tuning our mask, it enables us to dial-in just the right amount of rust. With the additions of more paint layers, we use particle brushes for scratches and surface details.
03: Pipe Wrench Setup Part A
In chapter 3, our next example is a bit more complex. It consists of a symmetry and a few polygon objects. After we collapse our symmetry object, we start with its largest parts and start laying out or UV islands.
04: Pipe Wrench Setup Part B
In chapter 4, we continue where we started, laying out or UVs, using various projection techniques and the relax tool.
05: Pipe Wrench Setup Part C
In chapter 5, after we collapse the parts to a single object, we arrange all our UV islands together into a single UV page. Then, we’re ready to paint a vertex color map, which will be our color-id-map, once we’ve brought it into Substance Painter via the FBX Export Module.
06: Pipe Wrench Paint Part A
In chapter 6, we open up a new project in Substance Painter using our pipe wrench model. After applying some smart materials, we’ll customize them to suit our project. After fine-tuning the sliders of the procedural aspects of our layered material, we’ll get more hands-on with the painting tools.
07: Pipe Wrench Paint Part B
In chapter 7, on an additional paint layer, we’ll use a stencil to create some surface detail. Then we come in with the particle brush and distress it with some cracks and burns. Then we knock it back a little bit with the partial eraser.
08: Pipe Wrench Paint Part C
In chapter 8, finally, we add some text using a stencil, then we bang it up a little bit with the eraser, then we’re ready to export all our maps.
09: C4D Materials
In chapter 9, first we set up our scene to render. We choose the physical render, enable global illumination, then we’ll light it with an HDRI image applied to a sky object. Then we merge in our spanner and pipe wrench, which we previous prepared, and then start building in materials with the maps we created in Substance Painter. And then, finally, we do some test renders to enjoy the fruits of our labors.
工期 2h 23m 项目文件包括 mkv
标题: cmiVFX –电影4D 到物质画家工作流程
信息:
在这个系列中, 我通过我的过程, 从 Cinema4D 的模型, 准备它的物质画家, 做的一切, 我们需要绘制它, 并创建所有我们的地图在物质画家, 然后把它带回 Cinema4D, 以利用物理渲染的属性, 我们创建。
这是一个很大的乐趣, 我希望你会和我一起学习一些新的东西!
章:
01: 扳手设置
在1章中, 我们建立了一个简单的资产, 在实体画家画。我们首先将模型折叠为低多边形对象。为了得到最好的结果的物质画家, 你必须确保你的模型有一个很好的 uv 布局没有重叠。我们将使用多种多边形选择工具, 如循环、环、长、填充和 uv 工具, 如 uv 削皮和放松, 以创建一个填充的 uv 页面。然后我们将导出一个高和一个低多边形版本。
02: 扳手漆
在2章, 我们打开了物质画家, 我们创建了一个新的项目, 我们添加我们的新的, low-polygon 的对象。我们将熟悉不同的管理人员: 货架, 层, texture-set 设置, 油漆属性。然后, 使用我们的高分辨率网格, 我们将烘烤出各种地图: 环境遮挡, 正常, 曲率等。然后, 我们添加一个粗糙的金属预设材料的层, 我们放置一个铁锈材料与面具发生器。然后, 通过 fine-tuning 我们的面具, 它使我们能够拨出适量的铁锈。随着更多的油漆层的增加, 我们使用粒子刷的划痕和表面细节。
03: 管子扳手安装件 a
在3章中, 我们的下一个示例更加复杂。它由一个对称和几个多边形物体组成。当我们折叠我们的对称对象, 我们从它的最大部分开始, 开始铺设或 uv 岛屿。
04: 管子扳手设置 b 部分
在4章, 我们继续我们开始, 铺设或乌布苏, 使用各种投影技术和放松工具。
05: 管子扳手设置部件 c
在5章中, 在我们将部分折叠成一个单一的物体之后, 我们将所有的 uv 岛屿一起排列成一个 uv 页面。然后, 我们准备绘制一个顶点颜色地图, 这将是我们的颜色 id 地图, 一旦我们已经通过 fbx 出口模块把它带到实体画家。
06: 管子扳手漆件 a
6章, 我们用我们的管道扳手模型, 在物质画家中开辟了一个新的项目。在应用了一些智能材料后, 我们将自定义它们以适合我们的项目。在 fine-tuning 了我们的分层材料的程序方面的滑块之后, 我们将会更实际地使用绘画工具。
07: 管子扳手漆 b 部分
在7章, 在一个额外的油漆层, 我们将使用一个模具来创建一些表面细节。然后, 我们来与粒子刷和苦恼它与一些裂缝和烧伤。然后我们用部分橡皮擦回去
08: 管子扳手漆 c 部分
在8章, 最后, 我们添加一些文本使用一个模具, 然后我们用橡皮擦了一点点, 然后我们准备输出所有的地图。
09: C4D 材料
在9章中, 我们首先设置了场景渲染。我们选择物理渲染, 使全球照明, 然后我们将它与一个 hdri 的图像应用于天空的对象。然后, 我们合并在我们的扳手和管扳手, 我们以前准备, 然后开始在材料与我们在物质画家创建的地图建设。然后, 最后, 我们做了一些测试呈现享受我们的劳动成果。