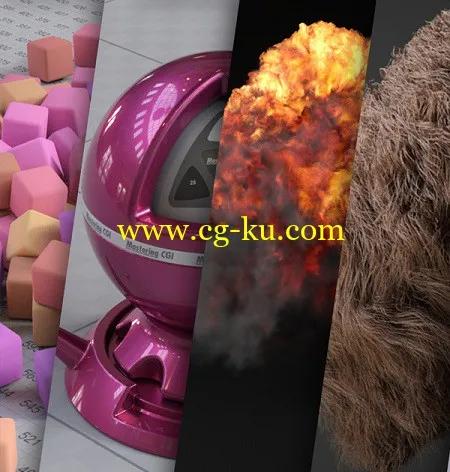
Duration 8h 35m With Project Files MP4
Title: MographPlus – Comprehensive Introduction to Arnold for 3ds Max
Info:
In this series of premium video tutorials in 8 hours and 35 minutes, that’s more than 500 minutes of tutorials, we learn how to use Arnold for 3ds Max.
First I show you where to find different Arnold tools and functions inside 3ds max, and walk you through the general workflow to get your job down with Arnold inside 3ds Max.
Sampling and ray depth are the most important principles that you should be familiar with when working with Arnold, that’s why we discuss them comprehensively in 57 minutes and in 7 lessons , we make sure you comprehend the core principles before moving on to more general topics like lighting and shading .
The next section of the course is dedicated to lighting , we learn about different lights in Arnold and different lighting techniques , we learn about Area Lights . spot , distant and point lights , mesh and photometric lights .
We learn what are light filters and how to use them , what is physical sky, SkyDome Light and image based lighting , you learn how to approach interior lighting in Arnold for 3ds max.
We learn about amazing volumetric effects in Arnold, including Atmosphere Volume and fog .
The lighting section of this course is about 1 hour and 55 minutes in 12 lessons.
In the next section of the comprehensive introduction to Arnold For 3ds Max, we start talking about Arnold materials and maps
First we learn about Standard Surface material which is the main material in Arnold and capable of creating all sorts of materials, we dedicated 5 videos in 80 minutes to discuss Standard Surface material thoroughly.
Then we discover bump and displacement mapping in Arnold. We explore Standard Hair material in a lot of details, this material lets you realistically create hair shaders, the Standard Hair is fantastic, and definitely one of the best hair shaders out there .
Then we learn about ray-switch , ambient occlusion, curvature, flakes , wire frame , utility , flat , lambert , two-sided and shadow matte shaders.
And then we take a closer look at the remaining materials and maps in Arnold, we learn about different color nodes , conversion , math and shading state nodes , we learn how to use utility nodes and hopefully after watching this section, you should be very comfortable developing complex materials using these long list of materials and maps .
The material section of this course is more 3 and a half hour in 18 lessons.
Then we take a look at 3ds max’s Physical Camera and how Arnold supports it, we learn about different camera features, we explore how to achieve camera effects like depth of field and motion blur.
In about 35 minutes and in 3 lessons we learn all about Arnold and Camera.
In the section 6 of the course we learn how to render our scenes in Arnold for cinema 4d, we learn about AOVs. What are the AOVs that Arnold offers and how to export and composite them in a composting app like After Effects. Then we learn about custom AOVs and how to write them out. After that we discover different render settings in Arnold.
The rendering section of the course is about 51 minutes in 2 lessons.
In the final section of the course we take a closer look at Arnold Properties Modifier and Arnold procedurals, and finally we learn about Arnold volume , we learn how capable Arnold is in handling openVDB files and rendering them realistically , we show you all the steps you need to render openVDB files in Arnold .
The final section of the course is 30 minutes in 3 lessons.
时间8h 35m项目文件的MP4
标题:mographplus–全面介绍3ds Max阿诺德
信息:
在这个系列的高级视频教程在8小时和35分钟,这是超过500分钟的教程,我们学习如何使用3ds Max阿诺德。
首先,我告诉你在哪里找到不同的阿诺德工具和功能内3ds Max,并步行通过一般的工作流程,以获得您的工作与阿诺德内3ds Max。
采样和射线深度,你应该熟悉与阿诺德工作时最重要的原则,那就是为什么我们讨论综合在57分钟和7节课,我们确保你理解的核心原则,然后移动到更一般的话题,灯光和阴影。
课程的下一部分是专门为照明,我们了解不同的灯光在阿诺德和不同的照明技术,我们了解区域照明。点,远点的灯光,网格和光度学灯光。
我们学习光滤波器是什么和如何使用它们,物理天空是什么,基础照明该光和图像,你学会如何接近室内照明在阿诺德为3ds Max。
我们在阿诺德身上学到了惊人的体积效应,包括大气体积和雾。
本课程的灯光部分约1小时55分钟,共12节课。
在全面介绍阿诺德的3ds Max的下一节中,我们开始谈论阿诺德材料和地图。
首先,我们了解标准的表面材料,这是阿诺德的主要材料,并能够创造各种材料,我们专门在80分钟内5个视频讨论标准表面材料彻底。
然后我们发现阿诺德的颠簸和位移映射。我们探索标准的头发材料在很多细节,这种材料让你实际创建头发着色器,标准的头发是梦幻般的,肯定是最好的头发着色在那里。
然后我们了解光线开关、环境遮挡、曲率、薄片、线框、实用工具、平面、朗伯、双面和阴影哑光着色器。
然后我们仔细看看剩下的材料和地图,在阿诺德,我们了解到不同颜色的节点,转换、数学和遮光状态节点,我们学习如何使用工具节点,希望看完这段,你应该非常舒适的使用这些材料清单和地图开发复杂的材料。
这门课的材料部分在18节课中要3个半小时。
然后我们来看看3ds Max的物理摄像机和阿诺德如何支持它,我们了解不同的相机特性,我们探索如何实现景深和运动模糊等相机效果。
大约35分钟后,在3课我们学习所有关于阿诺德和相机。
在本课程的6部分,我们学习如何使我们的场景在阿诺德的四维影院,我们了解的自动阀。什么是阿诺德提供的AOVs,如何出口和复合材料在堆肥应用后效果。然后我们学习习惯AOVs和如何写出来。之后,我们发现不同的渲染设置阿诺德。
该课程的渲染部分是2课51分钟。
在课程的最后部分,我们仔细看看阿诺德性能的改性剂和阿诺德的程序,最后我们了解到阿诺德的体积,我们如何能够在处理阿诺德是openvdb文件和渲染他们的现实,我们告诉你所有的步骤,你需要渲染的阿诺德openvdb文件。
课程的最后一节是3课30分钟。