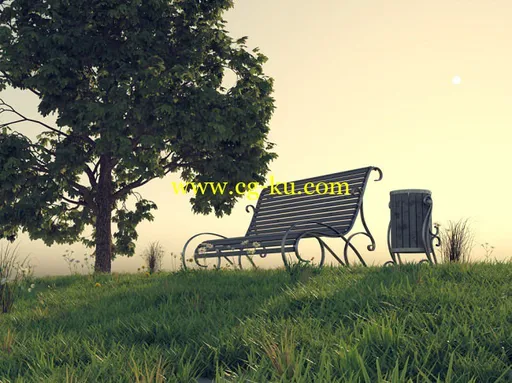
Duration 18h With Project Files MP4
Title: Mograph Plus – The Ultimate Introduction To V-Ray for 3ds Max
Info:
This is our biggest course ever here at MographPlus.com and we spent almost four months working on this course.
In this course, in more than 18 hours, or 1083 minutes of high quality and academic video tutorials, we explore one of the most popular render engines which is V-Ray from Chaos Group.
Our “Ultimate Introduction to V-Ray for 3ds Max”, is without a doubt, the most detailed, high quality and academically approached course on V-Ray up to now.
The videos are categorized into 9 sections,
Section 1 : Introduction
In section one, we give you a general overview of V-Ray in 3ds max and its user interface.
Section 2 : Lighting
Section two will be all about lighting, we go through all the lights that V-Ray offers. We explore V-Ray Area light, Mesh and dome light, V-Ray sun and sky, IES light, we learn how to use standard 3ds max lights with V-Ray and learn about V-Ray lighting tools like V-Ray Light Lister.
We literally explain every single option, light and parameter, with practical examples and visualize how they work.
Section 3 : Global Illumination
In section three, we talk about Global illumination or indirect lighting, first we learn how light rays work in real world and how V-Ray Simulates the same behavior using global illumination, and then we start learning about all the GI engines that V-Ray has, like Brute force, Irradiance map and light cache. We learn how to use these engines in different lighting scenarios to produce the most realistic lighting possible.
We go through every single available parameter in the GI tab of V-Ray settings with actual examples. And finally learn how to render flicker-free animations with Global Illumination.
Section 4 : Image Sampling
Section four will be dedicated to the very core of V-Ray, which is image sampling, first we learn the basic concept, and then we learn about Bucket and progressive image sampler, Global DMC options, Image filters and Render masks.
Section 5 : Materials
Section five is all about V-Ray materials, and this is the longest section of the course and we spend more than 5 hours in 17 lessons, explaining all the materials and maps that V-Ray has to offer.
We start this section with V-Ray material or VRayMtl and as this is the most important V-Ray material, we spend more than one hour, explaining this material over five lessons.
Then we talk about Bump and displacement mapping, blend material, two-sided, subsurface scattering, skin, hair and CarPoint materials.
We learn about V-Ray override and wrapper materials, And finally go through all the remaining materials and maps that are included in V-Ray.
Section 6 : Camera
In the next section we learn about Cameras and camera effects in V-Ray, first we Explore Physical camera in depth, then we learn how to produce and adjust effects like Depth of field and motion blur, we learn about different camera types in V-Ray.
0601_Physical_Camera
Then we explain stereoscopic 3d rendering and lens effects like bloom and glare in V-Ray, And like other topics, after watching this section, you should be a master of handling your camera in V-Ray, because everything has been explained in extreme details and based on academic approach.
Section 7 : Render Settings
In the next section we go through the remaining render settings, first we learn about Color mapping and why it’s so important in forming your final render.Then we talk about V-Ray virtual frame buffer, global switches, environment roll-out and how to produce and adjust caustics effect in V-Ray.We also discuss about more technical and advanced settings in the settings tab of V-Ray.We learn how to use V-Ray RT to interactively render and adjust our scene in real time.
Then in the longest lesson of the course, we discuss and explain V-Ray Render elements or render passes, we go through all the render elements and learn how to generate different render elements and what each one adds to the final render, then we learn how to composite those render elements using an external application like After Effects.
And finally in this section we take a look at V-Ray quick settings which allows you to control the overall quality of your render in a very simple and user friendly interface.
DOF
NoDOF
Section 8 : Geometries
In section eight we learn about V-Ray geometries, including V-Ray Proxy, V-Ray Fur, section clipper and other geometries.
Section 9 : Atmospheric, Environment and Volumetrics
In the final section, we discuss Atmospheric and Volumetric effects in V-Ray, first we learn about V-Ray environment fig and explain all of its options using visual examples, then we learn about Aerial Perspective and Toon Render Effect.
And in the final lesson, we learn about V-Ray Volumetric Grid which allows us to import grid-based cache formats like OpenVDB and render them using V-Ray, first we learn the basics and after that we import several OpenVDB files and try to adjust their shaders and settings to produce some exciting explosion, fire and smoke effects.
时间18h项目文件的MP4
标题:扫描加–到vray 3ds Max最终出台
信息:
这是我们最大的课程曾经在这里mographplus.com,我们花了将近四个月这个过程的工作。
在这个过程中,在超过18个小时,或者1083分钟的高质量和学术的视频教程,我们探讨一个最流行的渲染引擎,从混沌组V-Ray。
我们的“终极介绍V-Ray 3ds Max”,毫无疑问是最详细的,高质量的学术课程上探讨V-Ray到现在。
这些影片分为9个部分,
第1节:导言
在第一部分中,我们给你在3ds Max和V-Ray的用户界面概述。
Section 2 : Lighting
第二部分将所有关于照明,我们经历了所有的灯,V-Ray提供。我们探讨V-Ray面光,网格和顶灯,vray太阳和天空,IES光,我们学会了如何使用标准的3ds Max和V-Ray灯光和了解V-Ray照明工具如vray灯光。
我们用实际例子来解释每一个选项,光和参数,并可视化它们是如何工作的。
第3节:全球照明
在三节中,我们谈到了全球照明或间接照明,首先我们了解光线如何在现实世界中如何工作的V-Ray模拟相同的行为,使用全局光照,然后我们开始学习所有的GI引擎,V-Ray,像蛮力,发光贴图和灯光缓存。我们学习如何使用这些引擎在不同的照明方案,以产生最现实的照明可能。
我们通过对实际例子的V-Ray设置GI标签每一个可用的参数。最后学习如何使用全局照明渲染无闪烁动画。
第4节:图像采集
四节将专门的V-Ray的核心,它是图像的采样,我们首先学习的基本概念,然后我们了解桶和渐进图像采样器,全球DMC选项,图像滤镜和渲染的面具。
第5节:材料
五部分是关于V-Ray材料,这是本课程最长的部分,我们花了超过5小时,17节课,解释所有的V-Ray所提供的材料和地图。
我们开始这段与V-Ray材质或VrayMtl,这是最重要的造型材料,我们花了一个多小时,说明此材料超过五课。
然后我们谈谈凹凸和置换贴图,混合材料,双面,次表面散射,皮肤、头发和CarPoint材料。
我们了解V-Ray重写和包装材料,最后经过所有剩余的材料和地图,包括在V-Ray。
第6节:照相机
在下一节中我们了解相机和V-Ray的摄像效果,首先我们深入探索物理相机,然后我们学习如何制作和调整效果如景深和运动模糊,我们了解不同的相机类型在V-Ray。
0601_physical_camera
然后我们解释立体3D渲染和镜头效果就像在V-Ray布卢姆和眩光,就像其他的话题,看完这部分,你应该在V-Ray处理你的相机的主人,因为一切都已经说明了在极端的细节和基于学术方法。
第7节:渲染设置
在下一节中我们通过剩余的渲染设置,首先我们先来了解一下颜色映射以及为什么它如此重要,在形成最终渲染。然后我们谈谈V-Ray虚拟帧缓存、全局开关、环境推出,如何产生和调节中v-ray.we焦散效果的讨论更多的技术和先进的设置对v-ray.we设置选项卡,学习如何使用V-Ray RT交互渲染和实时调整我们的场景。
然后在课程的最长的课,我们讨论和解释的V-Ray渲染元素通过,我们穿过所有的渲染元素和学习如何生成不同的渲染元素和每一个添加到最后的渲染,然后我们学习如何组合这些元素渲染后的效果使用外部程序如。
最后,在这一节中我们将在V-Ray快速设置允许你控制你的渲染在一个非常简单的和用户友好的界面的整体质量一看。
自由度
东边挪得之地
第8节:几何学
在八节我们学习V-Ray的几何形状,包括vray代理,vray毛皮,截面剪和其他几何形状。
9节:大气、环境和容积
在最后一节中,我们讨论在V-Ray大气和体积的影响,首先我们先来了解一下vray环境图和解释所有使用可视化的实例的选项,然后我们了解空气透视和卡通渲染效果。
在最后一节课,我们学习关于V-Ray体积网格允许我们导入网格缓存格式如openvdb使他们使用V-Ray,首先我们学习基础知识之后,我们引进的几个openvdb FI