Lightroom 5 Essentials 04 Develop Module Advanced Techniques (2013)
MP4 | AVC 66kbps | English | 640x360 | 15fps | 5 hours | AAC stereo 56kbps | 1.16 GB
Genre: Video Training
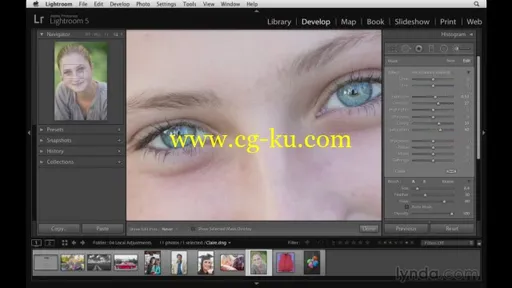
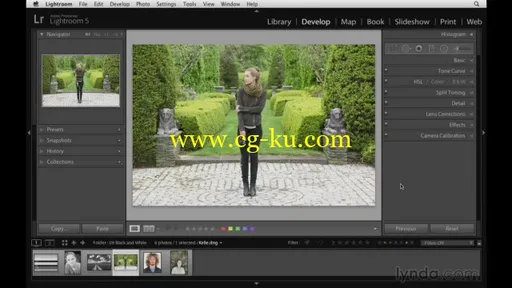
In this Lightroom 5 Essentials installment, Chris Orwig breaks out the Adobe Lightroom power tools. Learn advanced techniques to improve images with creative color, retouching, and other effects in the Develop module. Chris shows you how to crop and straighten your photographs for instantly improved compositions; remove dust and distracting background elements; selectively paint in adjustments to make your subject's skin, teeth, and eyes shine in portraits; and make both subtle and dramatic color changes, including black-and-white conversions. Plus, learn to increase image quality through noise reduction and clarity adjustments, apply split toning and vignettes, and correct for lens distortion.
Content:
Introduction 1m 36s
Welcome 59s
Using the exercise files 37s
1. Crop and Compose 23m 59s
Cropping your photographs 3m 19s
Cropping and rotating your image 3m 45s
Changing the crop aspect ratio 3m 30s
Straightening with the Crop tool 3m 24s
Drawing out a crop area 1m 42s
Changing your crop orientation 1m 30s
Working with the crop overlay 4m 18s
Synchronizing crop settings 2m 31s
2. Retouching Tools 34m 46s
Retouching with the Spot Removal tool: Part one 5m 7s
Retouching with the Spot Removal tool: Part two 5m 47s
Spot removal: Clone versus Heal 6m 45s
Cleaning up distractions in the background 5m 28s
Retouching away linear issues 4m 46s
Removing dust spots on a lens 4m 38s
Fixing red-eye 2m 15s
3. Using the Graduated Filter 14m 3s
Introducing the Graduated filter 4m 53s
Darkening the sky with the Graduated filter 3m 7s
Balancing exposure with multiple Graduated filter adjustments 2m 51s
Enhancing a sunrise with the Graduated filter 3m 12s
4. Painting in Localized Adjustments 47m 26s
Adjustment Brush overview 4m 15s
Improving exposure and color with the Adjustment Brush 4m 59s
Using Auto Mask to limit an adjustment to a specific area 4m 33s
Erasing an adjustment if you make a mistake 3m 26s
Creating a color-reduction effect 3m 23s
Selective sharpening 2m 55s
Correcting exposure 4m 23s
Improving shadows and highlights 4m 24s
Whitening teeth 3m 30s
Improving the eyes 5m 33s
Minimizing moiré patterns 1m 27s
Adjustment Brush and Basic panel workflow 4m 38s
5. Using the Radial Filter 15m 22s
Introducing the Radial filter 5m 8s
Using the Radial filter to create a vignette 2m 40s
Applying selective sharpening with the Radial filter 3m 13s
Improving the light workflow with the Radial filter 4m 21s
6. A Better Way to Access Tools and Panels 6m 31s
Reviewing the toolstrip shortcuts 1m 17s
Turning on Solo mode 2m 22s
Using shortcuts to open and close panels 2m 52s
7. Modifying the Tone Curve 16m 10s
Demonstrating the Tone Curve controls 4m 45s
Improving exposure and color with the tone curve 3m 56s
Using the tone curve to correct and enhance 4m 44s
Recovering shadow and highlight details with the tone curve 2m 45s
8. Changing HSL and Color 15m 44s
Understanding the HSL controls 4m 13s
Changing color with the HSL controls 2m 58s
Improving color and tone with HSL 3m 30s
Using the HSL and Basic panels together 2m 11s
Making subtle color improvements with HSL 2m 52s
9. Creating Better Black-and-White Photos 24m 16s
How to make compelling black-and-white conversions 4m 31s
Using the Black and White panel, the Basic panel, and the Adjustment Brush 5m 14s
Advanced black-and-white workflow 6m 13s
Using presets to convert to black and white 3m 16s
Creating black-and-white virtual copies 2m 55s
A conversation about creating better black-and-white photographs 2m 7s
10. Applying a Unique Color Effect with Split Toning 18m 46s
Split-toning essentials 3m 23s
Creating unique color with split toning 4m 54s
Adding a warm tone with split toning 4m 16s
Using split toning to craft a cross-processed look 3m 10s
Applying and creating split-toning presets 3m 3s
11. Noise Reduction and Sharpening 24m 40s
Introducing how the Sharpening control works 5m 0s
Gaining a better understanding of noise reduction 3m 26s
Using the Detail panel to improve your photographs 6m 44s
Improving the noise and sharpness of an underexposed image 4m 31s
Enhancing the details for a well-exposed photograph 4m 59s
12. Making Lens Corrections 31m 15s
Leveling your photographs with Upright 2m 58s
Removing distortion with the Basic and Manual controls 8m 0s
Improving an environmental portrait with Upright 2m 26s
Making dramatic perspective improvements 3m 8s
Correcting fish-eye distortion 2m 39s
Making subtle perspective corrections 5m 46s
Removing color fringing or chromatic aberration 4m 1s
Quick and easy color fringing removal 2m 17s
13. Adding Vignette and Grain Effects 15m 21s
Creating a unique look with the Grain controls 4m 19s
Adding or removing lens vignetting 5m 8s
Applying a vignette to a cropped photograph 3m 19s
Creating a border effect 2m 35s
14. Using the Camera Calibration Controls 10m 23s
Improving color with camera calibration profiles 3m 39s
Customizing color with the calibration controls 4m 1s
Creative color with camera calibration 2m 43s
Conclusion 33s
Next steps 33s


发布日期: 2014-03-11