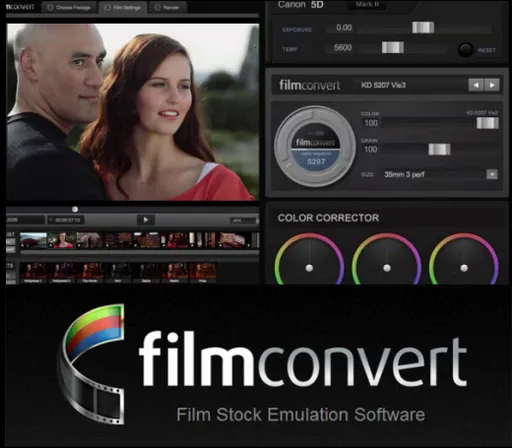
FilmConvert Pro v2.31 for After Effects and Premiere Pro (x64) | 74 MB
FilmConvert Pro
- is a film stock emulation plugin for After Effects, Premiere Pro. Give Digital camera footage the color and grain of your favorite film stocks. We've said a lot about the digital versus film debate, and a lot of people have a lot of different opinions. Film still had a technological advantage over digital until really the last few years or so, and now we have digital sensors which can match or exceed film stocks with dynamic range.
Either way, with digital sensors being "too clean" for some people who have loved the look of film, there is a program called FilmConvert that takes the color information of specific cameras and actually uses that to determine how a specific film stock could best be represented using that sensor. Click through for some videos of the program in action.
Applying FilmConvert to your media
Once FilmConvert is installed, you will want to apply it to your footage. To do that:
First open up After Effects or Premiere.
Create a new project, or open up an existing project.
In the case of a new project, import some media, and drag it onto the timeline (Premiere) or a composition (After Effects).
If in Premiere find the Effects tab. In After Effects, find the Effects menu item.
Go the Film Emulation category, which currently has just one item FilmConvert. Drag the effect onto your media.
You will now see some color changes, grain and FilmConvert water marks on your media!
NOTE: If the Film Emulation category is not visible in Premiere, close Premiere, then re-launch with the Shift and Alt keys held down until the welcome screen appears. This will clear the plugin cache.
Camera Controls
- Source Camera Selects the camera (or camera type) used to shoot your footage. This setting is required in order to apply the correct color correction.
- Exposure Performs an adjustment prior to the film emulation being applied.
- Temp Adjusts the color temperature. This assumes that the clip temp is 5600 (daylight). Moving the slider to the left makes the scene cooler. Moving to the right makes it warmer.
Film Controls
- Convert To drop down Selects the particular film stock to be emulated.
- Size drop down Selects the negative size to emulate. Smaller values such as 8mm are fuzzier with larger grain. Larger values have smaller grain.
- Film Color slider Adjusts the balance between the original digital camera color palette, and the film color palette. Typically you would leave this at 100% film
- Grain slider Adjusts the amount of grain applied to the image. The default is 100%, which is an accurate representation of the grain for the selected film stocks. Some stocks have more grain - such as D3200.
- Blur Slider Adjusts the amount of blur applied to the image when either an 8mm or 16mm negative size is chosen. The default is 100%, which is an accurate representation of the amount of fuzziness that will be present with the selected negative size. The blur is applied before the grain.
Home Page
-
http://filmconvert.com/
发布日期: 2015-08-06