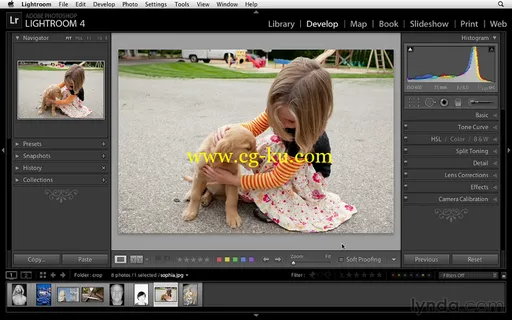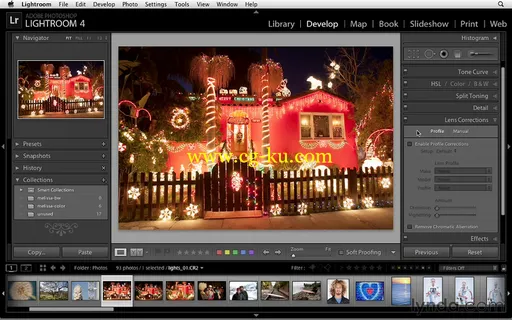
Photoshop Lightroom 4 Essentials: Enhancing Photos with the Develop Module
WEBRip | MOV + Project files | English | 960 x 600 | AVC ~184 kbps | 15 fps
AAC | 96 Kbps | 48.0 KHz | 1 channel | 5h 36mn | 1.61 GB
Genre: eLearning Video / Photographing, Adobe Photoshop
In this installment of the Photoshop Lightroom 4 Essentials series, author and teacher Chris Orwig guides photographers through the process of improving images with creative color, sharpening, and other effects in the Lightroom Develop module. The course covers each of the tools and features in the Develop module, and shows how to perform basic adjustments, such as exposure enhancement; how to improve image quality through noise reduction and clarity adjustments; how to apply creative effects, such as split toning and vignettes; and how to perform advanced tasks, such as correcting for lens distortion. Exercise files are included with the course.
Topics include:
Improving tone, color, and contrast with the Basic panel
Adjusting hue, saturation, and lightness with the HSL controls
Performing local edits using the adjustment brush
Converting to black and white
Split toning to create a sepia tone
Understanding sharpening
Correcting distortion
Removing chromatic aberration
Adding or correcting vignettes
Using the post-crop controls
Adding film grain effects
Understanding camera calibration in Lightroom
Content:
Introduction
2m 1s
Welcome
1m 17s
Using the exercise files
44s
1. Getting Started with the Develop Module
22m 4s
Develop module overview and essential shortcuts
4m 13s
Panel navigation tips
4m 53s
Using the Develop module presets
3m 32s
Creating your own presets
4m 1s
Using the Snapshot and History panels
3m 40s
Working with the tool strip
1m 45s
2. Develop Module Workflow Tips
15m 20s
Working with legacy Lightroom files
6m 53s
Viewing the before and after
4m 29s
Comparing and surveying images
3m 58s
3. Working with Color Temperature and White Balance
19m 42s
Understanding white balance and color temperature
2m 43s
Using the White Balance Selector tool
4m 22s
Correcting white balance with a color checker
3m 52
Working with white balance presets and fine-tuning white balance
4m 24s
Color correcting multiple images at once
2m 42s
Creativity and white balance
1m 39s
4. Masking Basic Tonal Adjustments
23m 5s
Getting familiar with the tone controls
3m 19s
Deconstructing the tone controls
5m 39s
Using the tone controls to enhance photographs
5m 28s
Correcting clipping with the tone controls
4m 53s
Synchronizing tonal adjustments with multiple images
3m 46s
5. Improving Vibrance, Saturation, and Clarity
22m 31s
Understanding vibrance and saturation
5m 6s
Working with vibrance and saturation
5m 38s
Color creativity with temperature, vibrance, and saturation
3m 19s
Understanding clarity
2m 34s
Using clarity in collaboration with vibrance and saturation
5m 54s
6. Basic Panel Workflow Reflections
10m 37s
Basic panel workflow
3m 38s
Using Auto Tone
1m 42s
Workflow considerations
5m 17s
7. Cropping and Composing
18m 27s
Cropping
3m 29s
Changing the crop aspect ratio
1m 47s
Straightening with the Crop tool
2m 49s
Working with the crop overlay
3m 4s
Crop creativity and orientation
2m 36s
Synchronizing crop settings
2m 36s
Exploring how to improve the composition of your photographs
2m 6s
8. Retouching Tools
15m 55s
Retouching with the Spot Removal tool
8m 26s
The Spot Removal tool: Clone versus Heal
4m 56s
Fixing red-eye
2m 33s
9. Using the Graduated Filter
16m 43s
Introducing the Graduated Filter
5m 14s
Darkening the sky with the Graduated Filter
6m 10s
Enhancing a sunrise with the Graduated Filter
5m 19s
10. Making Localized Adjustments
45m 51s
Adjustment Brush overview
7m 45s
Using Auto Mask
5m 55s
Burning and dodging a black-and-white image
6m 44s
Reducing noise
5m 40s
Minimizing moiré patterns
3m 18s
Painting in localized sharpening
2m 14s
Improving the eyes
4m 6s
Dimishing a distracting highlight
3m 42s
The Adjustment Brush and Basic panel workflow
6m 27s
11. Modifying the Tone Curve
15m 38s
Demystifying the Tone Curve controls
5m 5s
Using the tone curve to correct exposure
2m 16s
Changing tone and color with the the point tone curve
3m 39s
Making creative RGB adjustments
4m 38s
12. Changing HSL and Color
13m 36s
Understanding the HSL controls
4m 4s
Using the HSL Target Adjustment tool
1m 40s
Brightening tones with HSL
3m 21s
Using HSL to bring out warm and cool tones
1m 47s
Creative color with HSL
2m 44s
13. Converting to Black and White
36m 35s
Introducing black-and-white conversion
2m 38s
Converting to black and white
2m 16s
Modifying black-and-white tones with the Grayscale panel
5m 26s
Enhancing black-and-white images with the Adjustment Brush
9m 4s
Using presets to convert to black and white
5m 13s
Black-and-white workflow with virtual copies
5m 29s
Black-and-white images and collections
4m 22s
Creating better black-and-white photographs
2m 7s
14. Creative Color with Split Toning
14m 2s
Split-toning essentials
3m 34s
Advanced split-toning tips
2m 44s
Split toning a color image
3m 5s
Split toning to create a sepia-tone effect
2m 22s
Using split toning to enhance a sunrise
2m 17s
15. Noise Reduction and Sharpening
12m 21s
Introducing noise reduction
5m 10s
Understanding sharpening
5m 2s
Sharpening workflow
2m 9s
16. Making Lens Corrections
13m 35s
Using the Lens Correction controls
1m 56s
Correcting distortion
2m 45s
Making subtle adjustments to composition and tone
4m 10s
Removing fish-eye distortion
3m 18s
Removing chromatic aberration
1m 26s
17. Adding Vignette and Grain Effects
12m 55s
Adding and correcting vignettes
2m 24s
Using the Post-Crop controls
4m 5s
Adding a post-crop vignette
4m 26s
Working with film grain
2m 0s
18. Using the Camera Calibration Controls
5m 34s
Understanding camera calibration in Lightroom
3m 20s
Creative color with camera calibration
2m 14s
Conclusion
21s
Goodbye
21s


发布日期: 2016-11-01