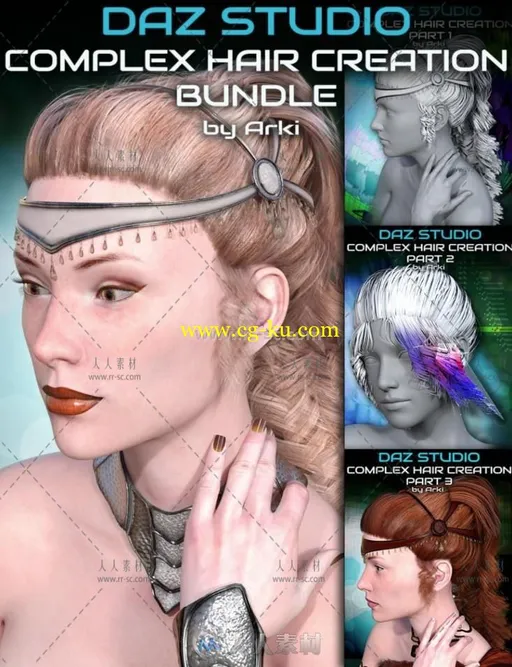
本模型是关于超精细美女发髻头发模型绑定纹理与视频教程合集,大小:1.6 GB,可调整替换很多细节,包含6小时使用教程,供广大设计师学习使用。需要使用软件:DAZ Studio或者Poser 。
使用方法1:安装DAZ Studio软件,直接将Content下的文件复制DAZ的资源库My DAZ 3D Library里面,安装完后(重启软件)可直接在Content Library里面调用!模型都可以输出为Maya等其他软件使用格式!
使用方法2:把 IM 开头的 zip 包下载下来后放到同一个文件夹内, 打开DIM→Settings→Downloads, 把 Download to 改为放 zip 的文件夹, 点击 Accept, DIM会自动识别素材包, 安装时DIM会自动更新素材数据库, 安装好后可以直接在 Smart Content 或 Content Library 中调用。
看下面英文说明是否需要基础模型组,
如需要Genesis 8 Female(s)基础模型组,请点击这里!
如需要Genesis 3 Female(s)基础模型组,请点击这里!
DAZ Studio是DAZ3d公司出品的一款3D造型应用软件,使用DAZ Studio,用户能轻易地创造美好的数字艺术. 用户可以使用这个软件在人,动物,车辆,建筑物,道具,配件和创造数字场景。 DAZ3D公司是他为Poser开发的大量可编辑三维人物造型库开始的。在经过几年的造型库开发的技术积累。DAZ3D推出了自己的三维人物动画软件DAZ Studio。
DAZ Studio拥有一个可以编辑的骨骼系统,大多数功能通过参数盘很容易操作。DAZ Studio的材质编辑允许用户改变属性,编辑的材质属性有表面颜色,表面贴图,凹凸贴图,透明贴图,位移贴图等。不但支持本身的DZ格式并且支持OBJ和PZ3格式的输出。DAZ Studio的渲染采用DNASOFT公司技术,并且支持业界著名的Renderman渲染器,渲染的质量速度都不错。
DAZ Studio是一个独特的艺术和动画设计工具,可选用虚拟人物,动物,道具,车辆,配件,环境等等元素。只要选择你需要的主题及设置,配置元素,设置光线效果,就可以创造出美丽艺术品。继承了前版的优势,DAZ Studio 4使用了一个新UI,并且更加易于使用。在应用程序中包括视频教程用于帮助用户使用,还有许多提高创作的技术创新。
Compatible Figures: N/A
Compatible Software:
Install Types:
Look at individual products in this bundle for install types
Details
Have you wanted to create attractive hair for Daz Studio, but got stuck on knowing where to start and how to handle a project such as this?
Arki (Kim Schneider) breaks down this project in detail, simplifies the approach and takes you through the steps in this three part tutorial. This was originally broadcast as a series of live webinars to a class that followed along with her techniques and created their own hair sets.
Requirements: Familiarity with Hexagon for modelling/rigging techniques, basic familiarity with ZBrush for creating a morph, Photoshop for texturing.
Video length for each part: approx 2 hours- 6 hours in total for this tutorial bundle.
Tutorial videos includes indexing so you can click and jump to different topics with ease.
Easy Hair Creation: Using rough shapes to refined strand groups
How to create hair can be broken down into a couple of small and simple steps: first you create your rough shape, then you work it down to the smallest element in your creation. I will only use basic modelling tools to achieve our goal, so this does not require complex background skill of your modelling software.
Arranging the Coiffure: Create a modular and flexible hair style
Interesting hair styles can do a couple of things - namely change looks. Open and down, done up and twisted, braided, slicked back - you name it.
Only your imagination is the limit, and in this class I will demonstrate how to create interesting pieces for a base wig to combine for a variety of different looks and styles.
Accessories for a Wig: Create elements of varying complexity as base for jewellery, etc
Ideally, you accessories (be it jewellery or other trinkets) complement your hair style. But what to create, and how to find that "matching recipe"?
This element of the class will show methods how to find a balance in design - and how to carry over that initial idea into 3D.
Instancing for Details: Working with repetitive pre-mapped elements
Most accessories repeat one or several basic elements over and over. Instancing can open a world of possibilities for you - using pre-mapped objects with all material zones already assigned will save you hours of work and will help you complete your project a lot faster!
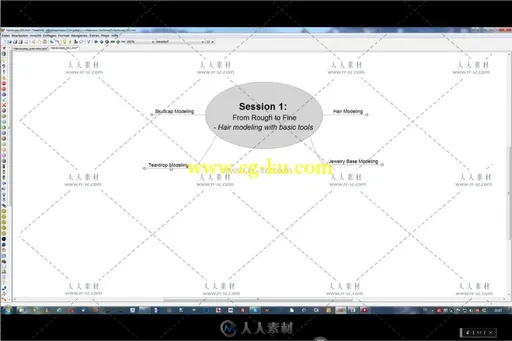
Session 1
From Rough to Fine - Hair modelling with basic tools:
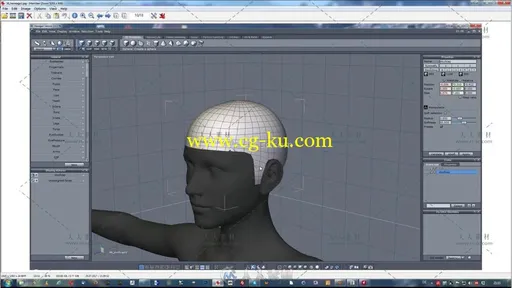
1 - Skullcap
* How to model a skullcap from a sphere shape
2 - Base shapes from extracted curves; for the base rough shape of the hair style
* Using curves and extracted polygon rows to create the base shape of your hair style
3 - Map these base shapes with rectangular maps
* Map your base hair shape with clean rectangular maps
4 - From rough shape to finest strands
* Cutting, copying & pasting and refining to add detail depth to the hair model
* These techniques will be used not only on the base hair model, but also on the accessories
5 - Use the same techniques to model the hair jewellery base shapes
* Modeling, premapping and assigning material zones
Session 2
Hair Rigging for all Situations - Plain and simple or advanced options:
1 - Quick rigging of the hairbase
* Using Daz Studio's Transfer utility to rig and autofit the base hair model
2 - Rig the ponytail, optional with multiple segments
* Advanced rigging for the accessories
3 - Create one morph as example for morph creation
* Using Hexagon or ZBrush to create a simple morph (for example to fit the jewelry over the base hair)
Session 3
Dying the Strands - Breathing life into your hair model:
1 - Hox to select the appropriate texture photos for skullcap and hair strips
* The different texture maps needed for the skull cap and the hair strands - and how to find them
2 - Texturing in Photoshop
* Working with the base photo reference material to create the hair texture
3 - Base material setup in Daz Studio
* A very quick walk-through how to create Iray hair materials
About the Presenter : Kim Schneider (Arki)
Kim attended the University of Applied Sciences in Münster, North Rhine-Westphalia where she received a Bachelor of Arts degree in Media Design and Illustration.
Over the years Kim has done work in the role-playing game industry applying her illustration skills for RPG games such as Engel for Feder & Schwert, Redaktion Phantastik, and the Pegasus Spiele game—Call of Cthulhu.
Her journey into 3D Digital Art began in 2000 with Poser (yes fourteen years of Poser experience!), then Poser Pro and started vending Poser content in 2006. She's since been now hard at work at creating content for Daz Studio.
She delves into other packages occasionally including Photoshop, Quixel, ZBrush, Hexagon, UV Mapper Pro and UV Layout in her workflow.
What's Included and Features
This Bundle Includes:
Complex Hair Creation Part 1: Modeling
Complex Hair Creation Part 2: Rigging
Complex Hair Creation Part 3: Texturing


发布日期: 2018-3-2