MP4 | Video: h264, 1280x720 | Audio: AAC, 48 KHz, 2 Ch | Duration: 3h 24m | 3.39 GB
Genre: eLearning | Language: English | + Exercise Files
Bring Your Portrait And Fashion Photography To The Next Level: Storytelling With Gels, Props And Studio Lighting
What Will I Learn?
Take stunning images using lighting techniques with color gels
Learn to analyze images and TV/movie scenes for inspiration
Instead of using techniques blindly, you will understand the "why" of your portrait shoot
Requirements
Knowledge of your DSLR settings e.g. ISO, Shutter Speed, Aperture
Some previous experience with portrait photography lighting is a definite plus
To be able to reproduce the pictures, you will need access to some lighting equipment
All additional props are inexpensive, so bring your imagination!
Description
One of the most important aspects of photography, is lighting. But it's not enough to just know the theory - to take outstanding images you need to tell a story!
Welcome to our course “Creative Photography Lighting - The Magic of Color And Gels” - a new tutorial in our creative portrait series.
Color Gels are an amazing yet simple tool to enhance the story of your image. But: Instead of just adding color for the sake of color, you need to think about:
a) How it changes the mood and result of your image and
b) How it pulls the viewer into your world!
My name is Sandy Dee. In our photo studio we have led over 50 photography workshops, specializing in creating conceptual photoshoots and in this course we will bring your creativity to a whole new level: You will learn how to unlock the magic of color and gel photography!
So why do you need to dive into Gel photography? Well there are many reasons.
Do you want to save money? A package of gels costs way less than buying rolls and rolls of paper.
Do you want to save time? Instead of changing heavy paper rolls that might require an assistant - just pop on a gel onto your light and continue with your shoot.
Do you want to have a less cluttered studio? A package of gels requires hardly any space in comparison to storing paper rolls.
Plus you can create an endless variety of looks fitting to your model’s story, outfit and fashion accessories.
And now comes the most important part why you should learn to unlock the magic of gels:
We all know that there is an abundance of images flooding the web these days and to stand out from the crowd is more important than ever, which can be very challenging. Luckily - Creativity is also more affordable than ever! That’s were colors and gels come into play. In the olden days you would have to risk wasting money on trial and error shots to get the look of your colored gel right in camera - but not any longer, thanks to your modern DSLR and LED display.
However: The scary fact still stands - working with colors and gels doesn’t really follow particular rules. Personally I love to take the guess work out of lighting and use a light meter - but with gels? It’s not that easy. Also: There are many different set-up possibilities, so how do you know which is the right one? And: Gels come in all sorts of thickness and colors - and do you use them on strobes or flashguns? And - how do you know that the color look fits to your story?
All these questions can be very daunting for photographers, so today we will answer all of them and walk you through the set-up, step by step.
The only requirement: You do need an understanding of your DSLR (manual settings) and you should have some practice with basic lighting and access to lighting equipment. Though we do explain important beginner subjects such as the recipe of great portraiture and basic lighting diagrams, the majority of the materials covers more intermediate techniques. However here we include as many options as possible: We will show you set-ups that are easily achievable and affordable with simple props, flashguns and low-end strobes.
Our promise: Creativity doesn’t have to cost a lot of money and: creative lighting doesn’t have to be confusing. You will see exactly what we are doing inside the studio with our “fly on the wall” videos. Furthermore Matt will walk you through the lighting diagrams to enhance your technical knowledge and my expertise will bring your creativity to the next level, quick and efficient, so you will be able to achieve these looks in no time:
* How to set-up a “Hitchcock” inspired movie look with shadows, colorful gels and gobos
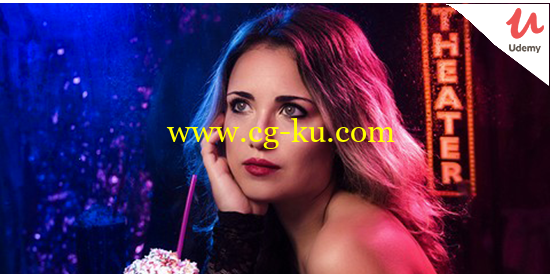
* How to set-up a Tv-show inspired “Diner” scene (inclusive a fake milkshake, color and rain)
* How to set-up your gels to achieve a romantic glow
* How to set-up your flashguns to create an interesting “star” effect
* How to set-up edgy Rim lights, colorful background lights and
* SO MUCH MORE
At the end of this tutorial you will be able to set-up images that look like a movie scene or were featured in a fashion editorial. If you want to wow your models or clients - then this tutorial is for you!
Who is the target audience?
Beginner to intermediate Portrait Photographers who would like to try new lighting techniques to make your portfolio sizzle
MP4视频:H264,1280X720音频:AAC,48 kHz,2 CH持续时间:3H 24M×3.39 GB
体裁:语言学习:英语+练习文件
把你的肖像画和时尚摄影带到下一个层次:用凝胶、道具和演播室照明
我将学到什么?
使用彩色凝胶照明技术拍摄令人震惊的图像
学习分析图像和电视/电影场景的灵感
不要盲目地使用技巧,你会理解你的肖像拍摄的“为什么”。
要求
了解您的DSLR设置,例如ISO,快门速度,光圈
有摄影摄影照明经验者优先。
为了能够重现图片,你需要一些照明设备。
所有额外的道具都很便宜,所以带上你的想象力吧!
描述
摄影最重要的一个方面就是照明。但是仅仅知道这个理论是不够的,要拍出你需要讲述的故事。
欢迎来到我们的课程“创意摄影照明-色彩和凝胶的魔力”-一个新的教程在我们的创意肖像系列。
彩色凝胶是一个惊人的,简单的工具,以加强你的形象故事。但是,不要仅仅为了颜色而增加颜色,你需要考虑:
a)它如何改变你的形象的情绪和结果
b)它如何吸引观众进入你的世界!
我叫Sandy Dee。在我们的摄影棚,我们已经领导了超过50个摄影工作室,专门创建概念照片,在这个过程中,我们将把你的创造力提升到一个全新的水平:你将学会如何解开色彩和凝胶摄影的魔力!
那么,为什么你需要潜入凝胶摄影呢?有很多原因。
你想省钱吗?一包凝胶比购买卷筒纸和纸卷要便宜得多。
你想节省时间吗?而不是改变可能需要助手的厚纸卷——只要在你的光上弹出凝胶,然后继续拍摄。
你想有一个不那么凌乱的工作室吗?与储存纸卷相比,一组凝胶几乎不需要任何空间。
此外,您可以创建一个适合您的模型的故事,服装和时尚配件的各种各样的外观。
现在最重要的部分是为什么你应该学会解开凝胶的魔力:
我们都知道,现在有大量的图片涌入网络,从人群中脱颖而出比以往任何时候都更重要,这是非常具有挑战性的。幸运的是,创造力也比以往任何时候都负担得起!这就是颜色和凝胶开始发挥作用。在过去的日子里,你将不得不冒着浪费钱尝试和错误的拍摄,以使您的彩色凝胶的权利在相机-但不再,多亏了您的现代DSLR和LED显示器。
然而,可怕的事实仍然存在-用颜色和凝胶并不真正遵循特定的规则。就我个人而言,我喜欢从照明中猜出,使用一个光表——但是用凝胶?并不是那么容易。还有很多不同的设置可能性,你怎么知道哪个是正确的呢?凝胶有各种各样的厚度和颜色,你用闪光灯还是闪光灯?你怎么知道颜色看起来适合你的故事?
所有这些问题对摄影师来说都是非常令人畏惧的,所以今天我们将回答所有的问题,并逐步地让你通过设置。
唯一的要求:你需要了解你的DSLR(手动设置),你应该有一些基本照明和照明设备的访问实践。虽然我们确实解释了重要的初学者主题,如伟大肖像的配方和基本的照明图,大部分的材料涵盖更多的中间技术。然而,这里我们包括尽可能多的选择:我们将展示你的设置容易实现和负担得起简单的道具,闪光灯和低端闪光灯。
我们的承诺:创意不需要花很多钱,创意照明不必让人困惑。你会看到我们正在做的工作室内的“飞在墙上”的视频。此外,Matt将带领您通过照明图表,以提高您的技术知识和我的专业知识会带来你的创造力,下一个层次,快速和高效,所以你将能够实现这些外观在任何时间:
*如何建立一个“希区柯克”启发的电影与阴影,五彩缤纷的凝胶和GOBOs
*如何建立一个电视节目启发“食客”场景(包括假奶昔,颜色和雨)
*如何建立你的凝胶,以实现浪漫的辉光
*如何设置你的闪光灯,创造一个有趣的“明星”效应
*如何设置边缘轮辋灯,丰富多彩的背景灯和
*那么多
在本教程的末尾,你将能够设置像电影场景或者在时尚社论中被描绘的图像。如果你想取悦你的模特或客户,那么这个教程是为你准备的!