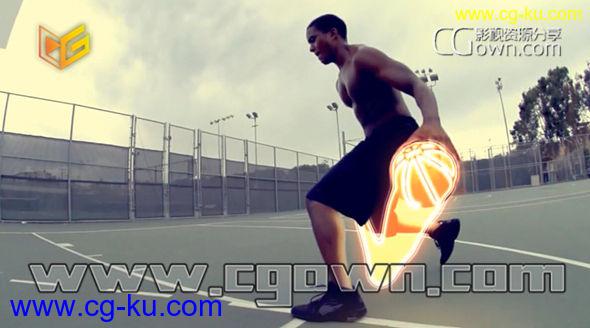
Digital-Tutors – Integrating Motion Graphics with Live Action Footage in Cinema 4D and After Effects
在本系列教程中,我们将学习的过程中建立动态图形与真人结合的影片。
我们还将学习如何组合这些运动图形与的方式,可以让即使是最生动的风格元素感受真实的画面。
首先,我们学习如何将素材采集到CINEMA 4D的,这样就可以通过动画。
然后,我们使用了一下几何到matchmove篮球在现场拍摄。
获得匹配的真正的球的位置和旋转后,我们将学习如何使用扫描和运动图形示踪剂创造美丽尾随图形。
在这个过程中,你会学到一些伟大的秘诀降低你的polycount在这些情况下的照明条件快速呈现。
我们还学习了如何使这个项目获得了我们的复合的最有用的传球最好的呈现。
一旦我们进入After Effects中,您将学习如何使用简单的效果和对位,使篮球火的生活。
我们甚至学会一个节省时间的技术来创建演员皮肤的现实二次照明,仿佛从球光真的被投在他身上。
通过培训结束时,你就会知道如何使用这两种CINEMA 4D和After Effects创建在一个可信的方式现场拍摄的镜头跟着惊人的运动图形。
In this series of tutorials, we’ll learn the process for building motion graphics that integrate with live action footage.
We’ll also learn how to composite those motion graphics with the footage in a way that can make even the most graphically styled elements feel real.
We begin by learning how to bring footage into CINEMA 4D so that it can be animated over.
We then use a bit of geometry to matchmove the basketball in the live shot.
After getting the position and rotation of the real ball matched, we learn how to use sweeps and MoGraph tracers to create beautiful trailing graphics.
Along the way you’ll learn some great tips for reducing your polycount in these situations for lighting fast renders.
We also learn how to render this project to get the best render with the most useful passes for our composite.
Once we move into After Effects, you’ll learn how to use simple effects and rotoscoping to bring the basketball fire to life.
We even learn a time-saving technique to create a realistic relighting of the actors skin, as if the light from the ball were really being cast upon him.
By the end of the training you’ll know how to use both CINEMA 4D and After Effects to create amazing motion graphics that follow along with live action footage in a believable way.

发布日期: 2014-10-8